Sonar Power for Performance
Today’s fishing electronics can do things we never imagined just a decade or so ago. But for them to perform properly all day, they need enough clean, dedicated power. Captain Lance discusses the basics for rigging your boat properly, to get maximum performance and run time from your marine electronics.
Sonar Install for Maximum Performance: Understanding Power
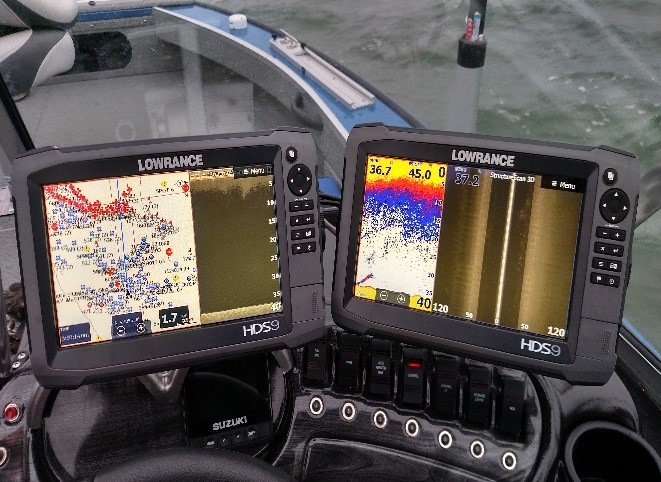 Today’s fishing electronics can do things we never imagined just a decade or so ago. It’s hard to find a serious fishing boat, even as small as fishing kayaks, without 1 sonar unit, and most boats are running multiple units, some up to 6! We expect a lot from our fishing electronics and get frustrated when they do not work. When we talk with anglers about poor electronics performance, there is one common thread that comes up again and again…poor power. Modern electronics, especially those with touchscreens, using multiple sensors or high-performance transducers need power; and LOTS of it. Below are some tips to help you guarantee you have enough CLEAN power for your electronics perform the best they can.
1) Batteries: The easiest thing anglers can do to guarantee good electronics performance is simple…install a deep cycle battery DEDICATED to doing nothing but powering the electronics in the boat. With the power requirements of modern fishing electronics, pulling power off the cranking battery is no longer an issue. A dedicated battery guarantees clean power and keeps the cranking battery fully charged and ready to start the engine. Whether you choose lead acid, AGM or Lithium just be sure it is the biggest Deep Cycle battery you can fit!
2) Wiring: Okay, all you DIY people, pay attention!! Marine wiring is DIFFERENT and is NECESSARY for a quality, problem free electronics install. Do it right the first time, and it will last as long as you own the boat. It’s easy to tell the difference. Be sure the wire you choose for the main power run is rated as AWG and not SAE. Wire rated AWG is marine grade, has more copper and an insulation better suited to marine environments. Tinned wire is preferred by some installers since it does help prevent corrosion, especially at terminal connections. When it comes to wire gauge, bigger is always better, especially if running multiple units for a full fishing day. Somewhere in the 10-12-gauge range is usually enough for most boat installs. Terminals and lugs are another area to focus on. Spend a few extra pennies and get the right ones for a marine install. 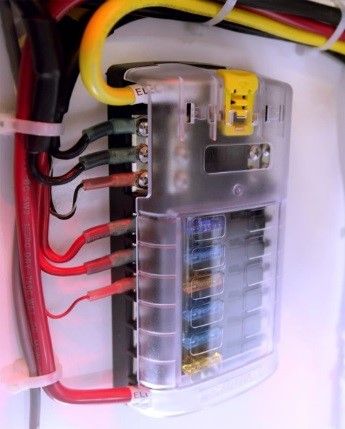 If possible, have the main battery lugs installed at a marine store. Most can install marine grade lugs using a hydraulic tool that creates a trouble-free connection to the battery. Terminal connectors are another piece of the power puzzle that some installers will try to save a few dollars…DON’T! Buy quality marine grade terminal connectors, use a high-quality crimping tool and always use heat shrink to ensure water tight integrity. You will see in Part 3 why we prefer ring terminals for hooking up our electronics.
3) Fuse Panel: If you want to do this right, use a Power Distribution Block in a central location in the boat. I prefer under my main console, and all my electronic power leads are ran to the fuse panel. Now if I have an issue, I can isolate where the problem is a lot easier. The main wiring from the dedicated battery (Steps 1 and 2) is connected to the fuse panel and all other electronics will hook into the panel, preferably with ring terminals to prevent vibration from shaking them lose. Pick a fuse panel with a dedicated ground bar and with enough fuses to accommodate your future power needs. The most popular panel we use has 12 slots, with both negative and positive wires attaching with ring terminals.
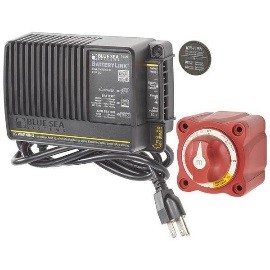 4) Charging: Obviously we need to keep our accessory battery charged and this is a two-step process. First, while we are at home or at the marina, we want an on-board battery charger that is easy to plug in and will charge and maintain our cranking and accessory batteries. On the water we also need a way to charge our accessory battery and the easiest way is an Automatic Charging Relay (ACR). This system isolates your cranking and accessory batteries from each other so the cranking battery will never be dead, even if the accessory battery is completely drained. Then, when the main engine is started and the cranking battery has been fully charged by the alternator, the ACR kicks in and sends all of the alternator’s charging power into the accessory battery automatically! Our favorite system is made by Blue Sea Systems and is called “Mini Add-A-Battery Plus”. This system includes an ACR, a 2-bank on-board charger, a master power switch and remote monitoring indicators.
Keeping modern fishing electronics performing at maximum ability all starts with them getting adequate, clean power. Follow the steps above and you will have no issues every day on the water.
Here is a link to the best source for high-quality marine wiring, terminals, power distribution, charging and more including helpful videos, charts and power calculators. www.bluesea.com